 |


Installing Test Agent. Release Management 2013. Installing Release management Client. Set up Stages. Set up servers and environments
|
|
|
|
Installing Test Agent
1. Download test agent install from http: //www. microsoft. com/en-us/download/details. aspx? id=40750 and install on the the server on which it will be run.
2. Open the Test Agent Configuration Tool and complete the fields:
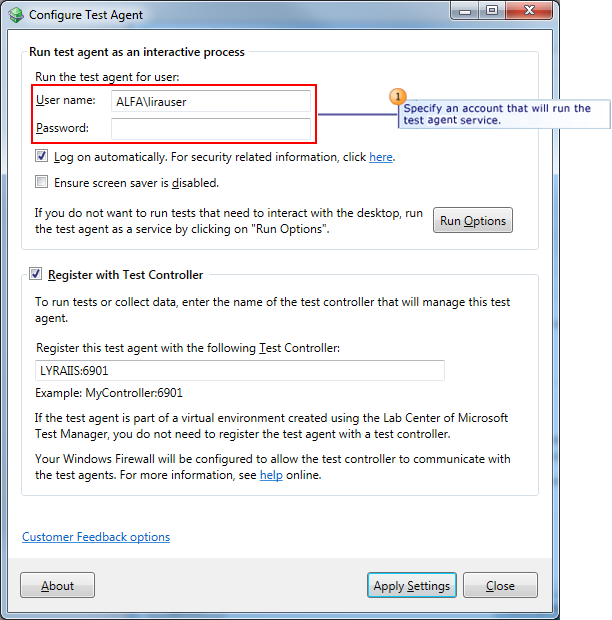
Tips:
- The user which is specified in Machines and Advanced step must be a member of the Administrators group on all the selected machines.
- Machines which are added to the environment must be registered in the domain.
Release Management 2013
Installing Release management Client
1. Download release management client 2013 from the http: //go. microsoft. com/fwlink/? LinkId=512595 and install client on the local computer.
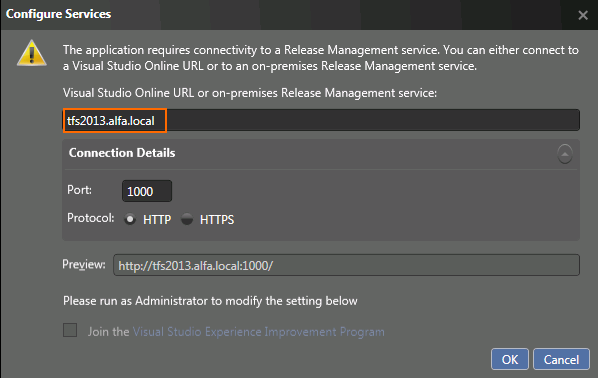
2. Start the Release Management Client and connect to tfs2013. alfa. local.
The following steps guide you through the essential parts of the release process.
Set up Stages
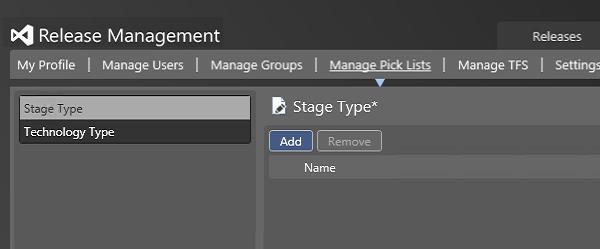
1. From the Administration tab, in the Manage Pick Lists add a stage type for each step you need in the release process of your app.
Set up servers and environments
Installing Deployment agent
1. Install and configure a deployment agent to any machine that will be part of the environment used to deploy your app.
2. Open the Microsoft Deployment Agent 2013 and complete the fields
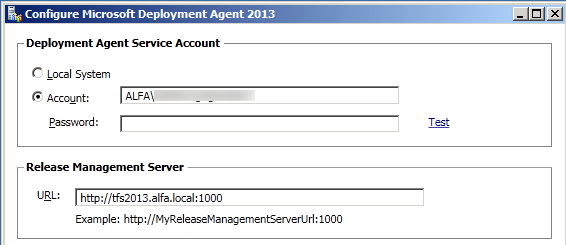
Note: The Deployment Agent Service Account must be a member of the Administrators Group.
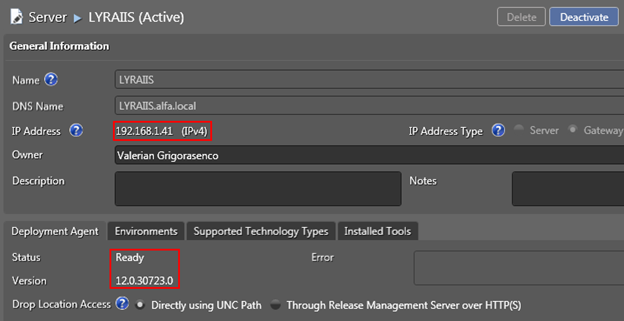
Register servers
1. In the Configure Paths tab, in the Servers click New button.
2. Register servers for different environments where app will be deployed.
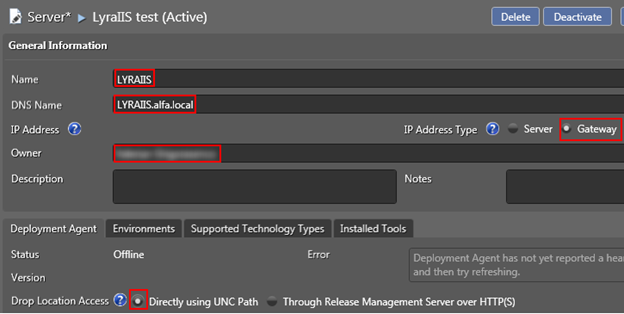
The successful registration of the server will be shown as follow
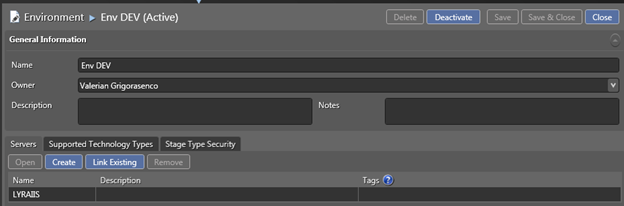
Create environments
1. In the Configure Paths tab, in the Environments click New button.
2. Complete Environment Name and Owner and link earlier created server by clicking “Link Existing” or create a new server by clicking “Create”.
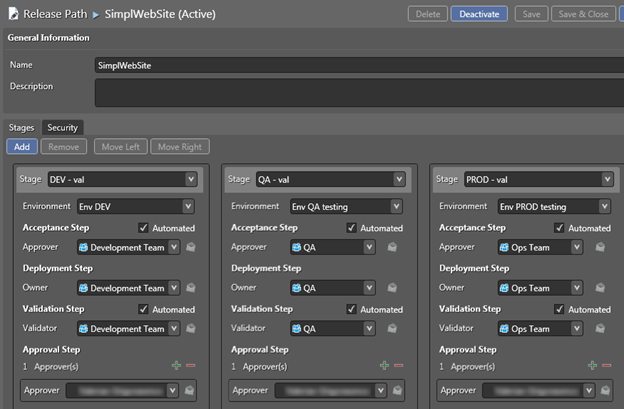
Create a release path
Create a release path to represent the stages that your release must go through.
1. In the Configure Paths tab, in the Release Paths click New button.
2. Add stage and choose the environment and approvers to use for each step of the stage of your release. You can add multiple final approvers for each stage if you want to. The manual acceptance of the Acceptance and Validation Step can be omitted by checking the Automated checkbox.
Create a release Build
First we need to import the release management build workflow that will allow us to trigger deployment from within the team foundation server build.
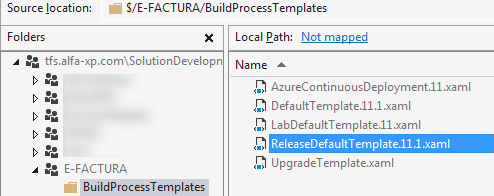
1. Go to C: \Program Files (x86)\Microsoft Visual Studio 12. 0\Release Management\Client\bin and copy ReleaseDefaultTemplate. 11. 1. xaml file to the BuildProccessTemplates folder and import it to the source control and check in the imported file.
|
|
|
Now we will create a new Build definition.
1. In the Team Explorer window, click Builds and click New Build Definition.
2. In the Build Defaults step, specify the drop folder of the builds.
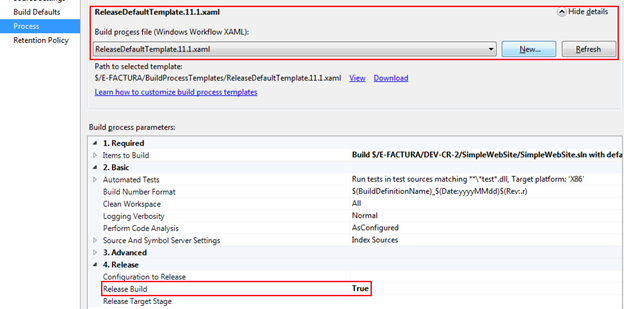
3. In the Process, we need to specify the build process template. Click New, choose the team project, click Browse and from the BuildProcessTemplates folder choose ReleaseDefaultTemplate. 11. 1.
In the build process parameters, under the 4. Release for the Release build parameter set False. This will not trigger the release of the builds yet.
4. Save the Build Definition and Queue a new Build.
5. After a successful build, open drop folder.

6. Open _PublishedWebsites folder and save the path to the drop folder (_PublishedWebsites\SimpleWebSite). This path will be used in creating a component for the release template.
|
|
|
