 |


Synchronizing the throttle bodies
|
|
|
|
CHK
 ADJ
ADJ
10.Install:
• all removed parts
NOTE:

For installation, reverse the removal proce-dure.

SYNCHRONIZING THE THROTTLE BODIES
NOTE:
Prior to synchronizing the throttle bodies, the valve clearance and the engine idling speed should be properly adjusted and the ignition timing should be checked.
1. Stand the scooter on a level surface.
NOTE:
Place the scooter on a suitable stand.
U Remove:
seat
Refer to “SEAT”.
center cover
side cover (left and right)
Refer to “SIDE COVER MOULDINGS AND
LEG SHIELD”.
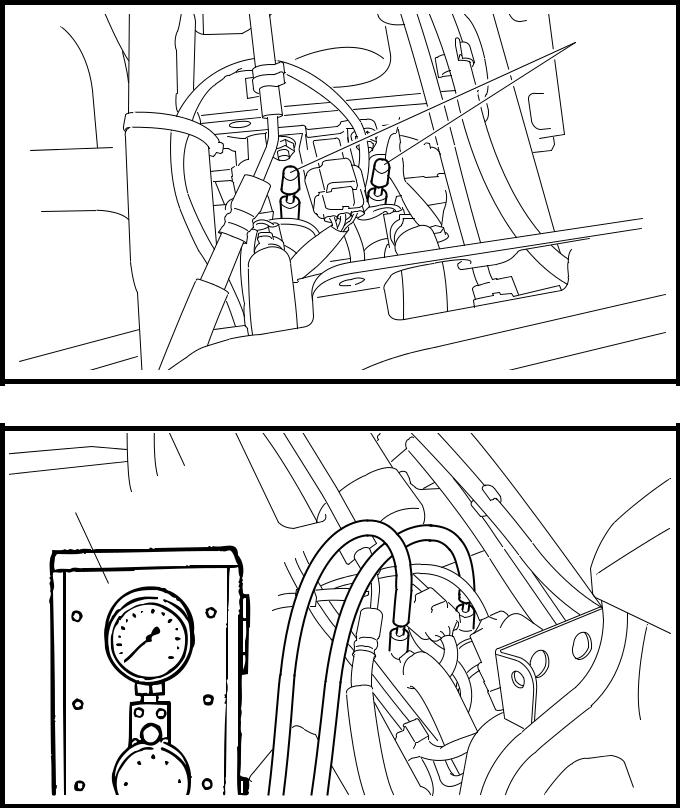
V Remove:
synchronizing pipe caps 1
8. Install:
vacuum gauge 1
(onto the synchronizing pipe)

Vacuum gauge 90890-03094, YU-44456
• Start the engine and let it warm up for sev-eral minutes.
3 - 17
CHK
SYNCHRONIZING THE THROTTLE BODIES ADJ

1 Measure:
engine idling speed
Out of specification → Adjust.
Refer to “ADJUSTING THE ENGINE
IDLING SPEED”.

Engine idling speed 1,100 ~ 1,300 r/min
• Adjust:
throttle body synchronization
▼▼▼▼▼▼▼▼▼▼▼ ▼▼▼▼▼▼▼▼▼ ▼▼▼▼▼▼▼▼▼▼▼▼
11 Turn the throttle body #1 air screw 1, and #2 air screw 2. Using the carburetor angle driver 3.
NOTE:
4) After each step, rev the engine two or three times, each time for less than a second, and check the synchronization again.
5) If the air screw is removed, turn the screw 3/4 turn in and be sure to synchronize the throttle body.
CAUTION:

Do not use the throttle valve adjusting screws to adjust the throttle body synchro-nization.

Carburetor angle driver 90890-03158

Vacuum pressure at engine idling speed
KPa (248 mmHg, 9.7 inHg)
NOTE:
The difference in vacuum pressure between two throttle bodies should not exceed 1.3 kPa (10 mmHg, 0.38 inHg).
▲▲▲▲▲▲▲▲▲▲▲ ▲▲▲▲▲▲▲▲▲ ▲▲▲▲▲▲▲▲▲▲▲▲
5) Measure:
engine idling speed
Out of specification → Adjust.
Make sure that the vacuum pressure is within specification.
3 - 18
SYNCHRONIZING THE THROTTLE BODIES/
ADJUSTING THE EXHAUST GAS VOLUME
CHK
ADJ
|
|
|

 1
1 


 2
2

 1
1 

 2
2
9. Stop the engine and remove the measuring equipment.
10.Adjust:
• throttle cable free play
Refer to “ADJUSTING THE THROTTLE
CABLE FREE PLAY”.

Throttle cable free play (at the flange of the throttle grip)
3 ~ 5 mm (0.12 ~ 0.20 in)
11.Remove:
• vacuum gauge 12.Install:
• side cover (left and right)
• center cover
Refer to “SIDE COVER MOULDINGS AND
LEG SHIELD”.
• seat
Refer to “SEAT”.
EAS00869
ADJUSTING THE EXHAUST GAS VOLUME
NOTE:
Be sure to set the CO density level to stan-dard, and then adjust the exhaust gas volume.
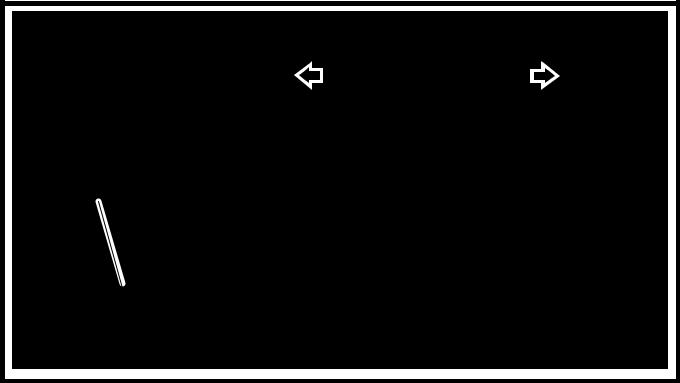
6. Turn the main switch to “OFF” and set the engine stop switch to “  ”.
”.
7. Simultaneously press and hold the “SELECT” 1 and “RESET” 2 buttons, turn the main switch to “ON”, and continue to press the buttons for 8 seconds or more.

NOTE:

5. All displays on the meter disappear except the clock and tripmeter displays.
6. “dIAG” appears on the tripmeter LCD.

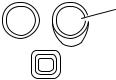
6. Press the “SELECT” 1 button to select the CO adjustment mode “CO” or the diagnostic mode “dIAG”.
7. After selecting “CO”, simultaneously press the “SELECT” 1 and “RESET” 2 buttons for 2 seconds or more to execute the selec-tion.
3 - 19
ADJUSTING THE EXHAUST GAS VOLUME/
CHECKING THE EXHAUST GAS AT IDLE
CHK
ADJ
1

 2
2


 1
1 

 2
2
8. Press the “SELECT” 1 and “RESET” 2 buttons to select a cylinder.
NOTE:

The selected cylinder number appears on the tripmeter LCD.
8. Both the “SELECT” button and “RESET” but-ton can be used to change the selected cylin-der number.

5. After selecting the cylinder, simultaneously press the “SELECT” and “RESET” buttons for 2 seconds or more to execute the selec-tion.
6. Change the CO adjustment volume by pressing the “SELECT” 1 and “RESET” 2 buttons.
NOTE:

The CO adjustment volume appears on the tripmeter LCD.
7. To decrease the CO adjustment volume, press the “RESET” button.
8. To increase the CO adjustment volume, press the “SELECT” button.

8. Release the switch to execute the selection.
9. Simultaneously press the “SELECT” and “RESET” buttons to return to the cylinder
selection (step 5).
10.Turn the main switch to “OFF” to cancel the mode.
|
|
|
