 |
6-2-1 Tool Bar. 6-3-1 Adjustment Steps
|
|
|
|
6-2-1 Tool Bar

From left to right:
(1) Add task: Open the RIPed image file in the appointed folder. If the RIPed image file stored in the root directory of disk E, you can just open the disk E and choose the image file you wanted.
 |
(2) Delete task: Delete task which has been done.
(3) Print: Before printing, check the image file and then click it to start.
(4) Suspend: suspend the current printing process. When you click the icon, its status will change to Ў°continueЎ±. Click it again to restart the printing process
This function is same as that on the led panel.
(5) Stop: stop the current printing process. If you click it, the printing process cannot be restarted again.
(6) Test of nozzles: to print the test image of the nozzle.

 |
| ||||||||
 | ||||||||
 | ||||||||
 | ||||||||
(7) Clean: clean the print heads. Click it to let the ink pump start cleaning the heads.
(8) Move towards left: move the carriage to the left. The same as the led panel.
(9) Move towards right: move the carriage to the right. The same as the led panel.
(10) Media back: move the media back. The function is same as the led panel.
(11) Media ahead: move the media ahead. The function is same as the led panel.
(12) Reset: move the carriage to the origin position.
 |
6-3 Print Head Calibration
This paragraph will discuss the calibration process in detail.
6-3-1 Adjustment Steps
1Ј® Print the head testing bar to check if the ink drop is correct. MenuЁ¤head testЁ¤yes.

Or Senior menu model Ё¤head testЁ¤vsd1Ё¤yes. In the senior model, there are 4 different VSD model and test images. And the color is different. If there are fitful blocks or vacancy, the head is jammed. You should clean it until its printing status reaches the best.
 |
2. There are 2 aspects of calibration: hardware calibrating and software calibrating.
For hardware calibrating, there are 2 major procedures, including nozzle discrepancy test and incline test. We can adjust the print head holder to align the print headЎЇs left-right incline and front-back level, in order to assure the headЎЇs level and parallel towards the printing platform.
Nozzle discrepancy test: Senior menu modelЁ¤calibrationЁ¤nozzle discrepancy testЁ¤yes.

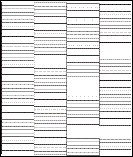
See the picture above, when you get the test image, check it with 50-100times magnifier. The basic color is black. The location relation between black and other colors: at the same level and contrast to K, the first group and second group of nozzlesЎЇ position. It also shows the relative position of the 2 group of nozzles in same color. As the K is far away from Y, itЎЇs apparent if there is nozzle discrepancy. So youЎЇd better check the color K and Y. If both are 3 straight lines, they should be overlapped. But if K has 3 lines and Y has 2 lines, they should be crossed to each other.
|
|
|

FYI: the image is opposite in the magnifier. If the test image looks like the above Ў°normalЎ± one, you can start printing process. Or you have to adjust the print head until it is Ў°normalЎ±.
Sometimes, the head may have problem, such as the 2 group of nozzles in same color is incompatible. Of course you cannot get a good test image.
If the machine has 2 heads, there are 2 test images. You can adjust the 2 heads separately.
Incline test: senior menu modelЁ¤calibrationЁ¤incline testЁ¤Enter .
After adjusting the level of the head(left-right incline), you cannot assure the surface of head is horizontal. Then you can check it by click incline test menu.


Caution: the test bar printing process is divided to 2 step, the first is printing from right to left for 2 times, then from left to right for 2 times. If the wide line is not clear enough, you can check the slim line, which is formed by dots and is easy to view. If the headЎЇs inner is higher than the exterior, you will get test bar as the second picture above. Otherwise, you will get the third picture above. Besides, if the test bars from both direction is the same, youЎЇd better not only check whether the media is vertical to the guide rail, but also check whether the platform is horizontal. At this moment, you can print the test bar in another place of the media to check whether the test bar looks the same.
If the malposition of the 2 directions is too much, you can adjust the both-direction calibration and carefully visual checking is unnecessary.
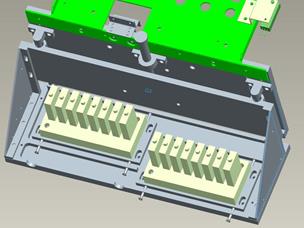
Calibrate the verticality of the head by adjusting the screws. See picture below.
Procedure:
 |
(1) Calibrating the individual verticality
of the 2 heads. The test bar
should looks like the picture below.

 |
(2) Then adjust the spacing of the two heads.
Only need to adjust one head. And meantime, in order to assure the verticality of the head, you have to adjust left-right screw at the same amount.
|
|
|


