 |
Minimum brake pad thickness 0.8 mm (0.03 in)
|
|
|
|
4. Install:
• brake pad spring 1 New
• brake pad springs 2 New
• brake pad shims 3 New
• brake pads 4 New
NOTE:

Always install new brake pads, a new brake pad shim and, new brake pad springs as a set.

▼▼▼▼▼▼▼▼▼▼▼ ▼▼▼▼▼▼▼▼▼ ▼▼▼▼▼▼▼▼▼▼▼▼
Б Connect a clear plastic hose 5 tightly to the bleed screw 6. Put the other end of the hose into an open container.
Б Loosen the bleed screw and push the brake caliper pistons into the brake caliper with your finger.
Б Tighten the bleed screw.

| Bleed screw | |
| . | 6 Nm (0.6 m · kg, 4.3 ft · lb) |
| T | |
| R | |
| . |
d. Install new brake pads, new brake shims and new brake pad springs.
▲▲▲▲▲▲▲▲▲▲▲ ▲▲▲▲▲▲▲▲▲ ▲▲▲▲▲▲▲▲▲▲▲▲
Л Lubricate:
front brake caliper retaining bolts

Recommended lubricant
Lithium-soap-based grease
CAUTION:

М Do not allow grease to contact the brake pads.
М Remove any excess grease.

4 - 27
 FRONT AND REAR BRAKES CHAS


Н Install:
brake caliper 1
front brake caliper retaining bolts 2
| T.R. | 27 Nm (2.7 m · kg, 19 ft · lb) |

О Check:
brake fluid level
Below the minimum level mark a → Add the recommended brake fluid to the proper level.
Refer to “CHECKING THE BRAKE FLUID LEVEL” in chapter 3.
О Check:
brake lever operation
Soft or spongy feeling → Bleed the brake system.
Refer to “BLEEDING THE HYDRAULIC BRAKE SYSTEM (XP500)” and “BLEED-ING THE BRAKE SYSTEM (XP500A)” in chapter 3.
EAS00583
REPLACING THE REAR BRAKE PADS
NOTE:

When replacing the brake pads, it is not neces-sary to disconnect the brake hose or disas-semble the brake caliper.

П Remove:
rear brake caliper retaining bolt (rear) 1
brake caliper bracket bolts 2
brake caliper 3
4 - 28
 FRONT AND REAR BRAKES CHAS
И Remove:
brake pads 1
brake pad springs 2

New 1  2 New
2 New

New 1

Й Measure:
brake pad thickness a
Out of specification → Replace the brake pads as a set.

Minimum brake pad thickness 0.8 mm (0.03 in)
4. Install:
• brake pad springs 1 New
• brake pads 2 New
|
|
|
Л rear brake caliper bracket 3 (to brake caliper)
NOTE:

Always install new brake pads, and new brake pad springs as a set.

4 - 29
 FRONT AND REAR BRAKES CHAS


 3
3

 a
a
b

▼▼▼▼▼▼▼▼▼▼▼ ▼▼▼▼▼▼▼▼▼ ▼▼▼▼▼▼▼▼▼▼▼▼
М Connect a suitable hose 1 tightly to the brake caliper bleed screw 2. Put the other end of this hose into an open container.
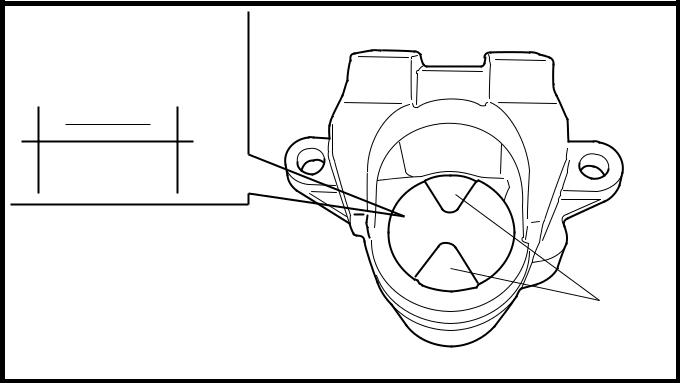
М Loosen the brake caliper bleed screw, and then turn the brake caliper piston 3 clock-wise until section a of the brake caliper pis-ton is level with the surface of the brake caliper body.
NOTE:

Align the recesses b in the brake caliper pis-ton with the brake caliper body as shown in the illustration.

c. Tighten the brake caliper bleed screw.

| Brake caliper bleed screw | |
| . | 6 Nm (0.6 m · kg, 4.3 ft · lb) |
| T | |
| R | |
| . |
Н Install new brake pads, new pad springs, and the rear brake caliper.
NOTE:

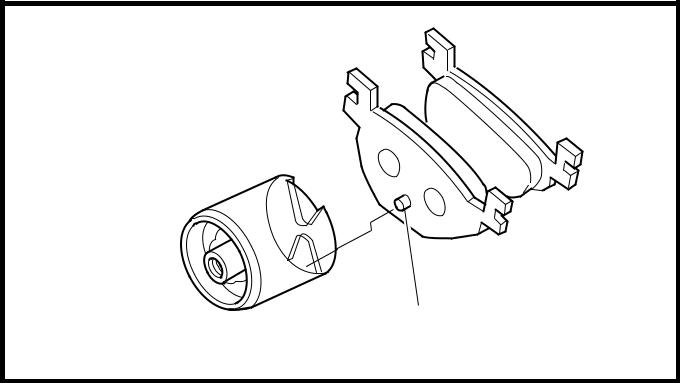
Align the projection c on the piston side of the brake pad with the lower recess in the brake caliper piston.

И Up
Й Down
▲▲▲▲▲▲▲▲▲▲▲ ▲▲▲▲▲▲▲▲▲ ▲▲▲▲▲▲▲▲▲▲▲▲
И 
 Й c
Й c
4 - 30
 FRONT AND REAR BRAKES CHAS
О Lubricate:
rear brake caliper retaining bolts

Recommended lubricant
Lithium-soap-based grease
CAUTION:

Р Do not allow grease to contact the brake pads.
Р Remove any excess grease.

С Install:
rear brake caliper retaining bolt

T.
R.
27 Nm (2.7 m · kg, 19 ft · lb)
Т Install:
rear brake caliper bracket bolts

T.
R.
40 Nm (4.0 m · kg, 29 ft · lb)
У Check:
brake fluid level
Below the minimum level mark a → Add the recommended brake fluid to the proper level.
Refer to “CHECKING THE BRAKE FLUID LEVEL” in chapter 3.
У Check:
brake pedal operation
Soft or spongy feeling → Bleed the brake system.
Refer to “BLEEDING THE HYDRAULIC BRAKE SYSTEM (XP500)” and “BLEED-ING THE BRAKE SYSTEM (XP500A)” in chapter 3.

4 - 31
 FRONT AND REAR BRAKES CHAS
|
|
|


