 |


5-2-8 How to Use the Dying System
|
|
|
|
5-2-8 How to Use the Dying System
Drying device made up of infrared heating and fan, through the cartridge fuses for protection.


(1)  Connect the power supply
 | |||
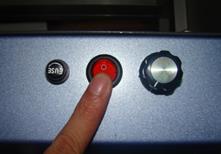 | |||
(2) Open switch, switch to 1.
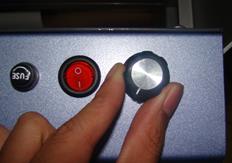
(3) Adjust infrared heating temperature, by adjusting knob to change the infrared heating,
clockwise to increase, counterclockwise to decrease.
 | |||||
 | |||||
 | |||||
5-2-9 How to Protect the Print Head
Water-based Machine and Eco-solvent Machine have different ways for protection.
Water-based Machine

Under the standby condition of LCD control PanelЈ Click Ў° CONFIRM BUTTON Ў±.

Eco-Solvent Machine
 Under the standby condition of LCD control panel,

 Click to move the carriage out of the head-protective plateЈpour some cleaning liquid into the glass cylinder,
 and click Button for protection
 |
5-2-10 How to advance the printing quality(Adjust the Print Head)
5-3 How to Use-- the LCD Control Panel
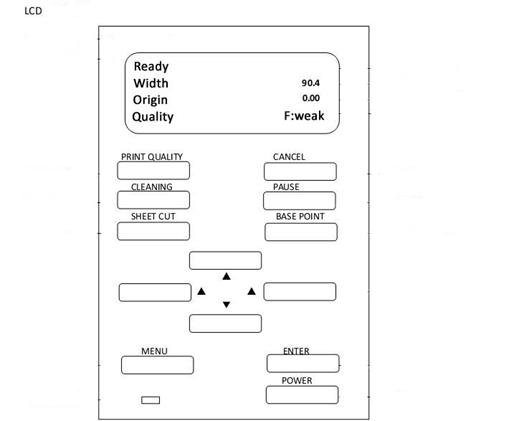 |
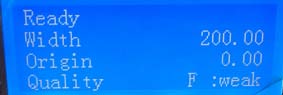
5-3-1 LCD control panel layout
 |
5-3-2 Press ButtonsЎЇ Instructions
Buttons do not need to attached, if the display shows an error, all key is invalid.

 ЈєLong press this button to control the carriage moving, move to the destination, release the button, and carriage stops immediately; If the mode has already entered menu, then it would be return and enter menu.

 ЈєAfter entering the menu, use the button UP or Down to control the
Ў°forward or backЎ± of the material.
 | |||
 |
|
ЈєAfter connecting the machine and press
to move the carriage to a specified location,
and then press this button to set starting printing point.
 |
|
ЈєAfter connecting the machine and under non-menu setting mode, ЈЁCurrently UselessЈ©
|
 |
ЈєAfter connecting the machine and under non-menu setting and printing mode, press the CLEANING button could carry out the cleaning. For more details, please refer to the tree-map for menu structure
|
| |
: During printingЈwhen the lines break, can press this button to pause
the printing, then clean the print head after which press the button
again to resume the printing.
|
|
|
Јєyou can click this button to
cancel the printing process.
 Afterwards, you will see a dialog
box with 2 options: YES and NO.
|
|
|
 Choose YES to stop the printing.
|
 Choose NO to go back to standby
 |
status.
| |
|
: click it to affirm and save the alteration.
|
Јєyou can set some parameters by clicking this button. It has the same function as the setting in the software. Both the machine and software setting take the last setting data for reference.
For example, firstly, you choose single-direction, high-speed in the software setting, then you choose both-direction, low-speed in the panel of the machine. Finally, the machine will print under low-speed, both-direction.
There show you how to change single-direction printing to both-direction printing. When the machine is standing by, click the MENU button and choose both-direction, save it and exit. FYI, right button means enter, left button means back to previous menu, up button means rewrite parameter. And after you input the expected parameters, remember to click Enter to save and back to previous menu.
5-3-3 Menu Dendrogram


6 How to Use the Software
6-1 Install the Software
Pick up the CD of Xunlang printing control software and insert to the computer.
 |
Firstly, find the file named Ў°dotnetfxЎ±. Double click it and you will see dialog box below:
Click Ў°yesЎ±, and you will see dialog box below.
 |
Then click Ў°I agreeЎ± and Ў°installЎ± to start the installation.
Finally, click Ў°OKЎ± to finish the procedure.
Open the Ў°releaseЎ± disk, double click the icon Ў±setup. exeЎ±. You will see dialog box below:
 |
Click Ў°NextЎ±:
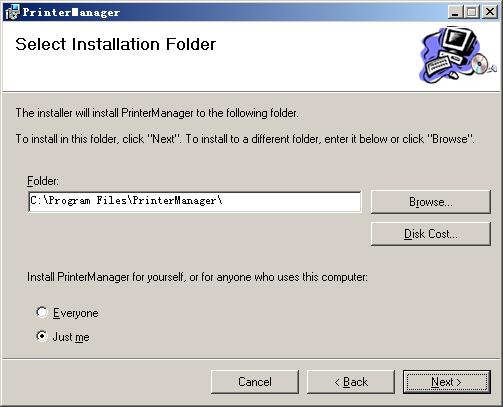
Choose the installation disk, the default installation disk is C\Program Files\PrintManager. If you want to install it in another place, click Ў°viewЎ± and choose the disk you like. Then click Ў°next stepЎ±.
 |
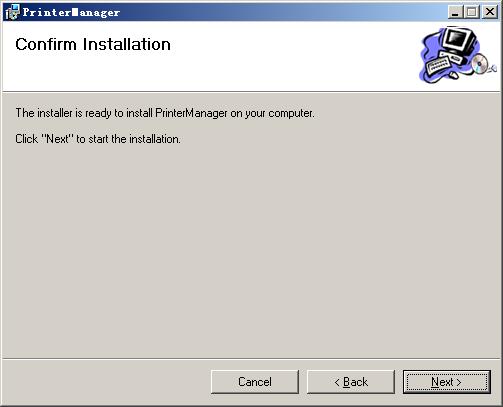
Then click Ў°NextЎ± and you will see the dialog box below:

Click Ў°CloseЎ±.
The installation is accomplished.
6-2 Interface Description
Double click the icon  on the desk, or click Ў°PrintManagerЎ± in Ў°Start/ProgramsЎ±, the window of Printmanager will turn up to you.
At this moment, you have to process the factory setting. Right click , there will be a dialog box, double click the  in Ў°attribute/search targetЎ±. You will see another dialog box below:
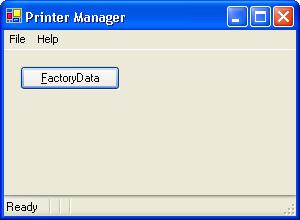 |
Double click Ў°factoryDataЎ±, see below:
 |
Input passwordЎ°00210400Ў±, see below:
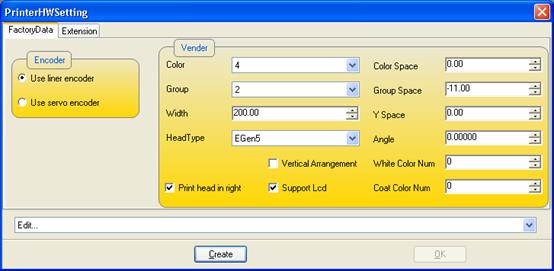 |
After finishing the Ў°factory settingЎ±, change to Ў°extension settingЎ±. See dialog box below:
 |
After setting all the parameters, click Ў±generateЎ±. See dialog box below:
 |
Finally, restart the machine.

Јє
|
|
|
